E-Bike Conversion Kit Battery Guide: Matching, Sizing, and Compliance
When converting a standard bicycle into an electric bike or upgrading an existing e-bike kit, the battery pack is the single most critical component. It dictates riding range, power delivery, acceleration, and property safety. Selecting the correct lithium-ion battery requires understanding system voltage, current limits, battery capacity, frame mounting space, and international safety certifications across key regions like North America, the European Union, and the United Kingdom.
PART 1: CORE E-BIKE BATTERY SPECIFICATIONS
Understanding these four primary electrical ratings ensures your battery matches the powertrain and provides reliable performance.
1.1 Nominal Voltage (V)
System voltage determines motor speed and power output. The standard configurations used in North American and European conversion builds are 36V, 48V, and 52V systems.
1.2 Battery Capacity (Ah)
Capacity in Amp-hours represents the usable fuel reserve of the pack. A higher Amp-hour rating stores more electrical charge, providing longer range per charging cycle. Common capacities range from 10Ah to 20Ah.
1.3 Total Energy (Wh)
Total energy in watt-hours is the most accurate metric to compare batteries across different voltages. Calculating energy uses a simple formula: Nominal Voltage multiplied by Capacity equals Total Watt-Hours. For example, a 48V 14Ah battery delivers 672Wh (48V multiplied by 14Ah).
1.4 Continuous Discharge Current (A)
Continuous discharge amperage indicates the ongoing power delivery capability of the battery. The battery management system (BMS) must sustain the high current drawn during aggressive acceleration and steep uphill climbs, or the system will cut out under load.
PART 2: BATTERY AND MOTOR CONTROLLER MATCHING PRINCIPLES
Proper powertrain integration requires pairing the battery pack with the controller's voltage rating and current draw.
2.1 Exact Voltage Compatibility
Voltage must match precisely between components:
A 36V controller requires a 36V battery, which reaches 42.0V at full charge.
A 48V controller requires a 48V battery, which reaches 54.6V at full charge for standard 13S configurations.
Advanced note: Some 48V controllers with high-voltage internal capacitors can operate with a 52V battery (14S configuration, 58.8V full charge) to reduce top-end voltage sag. Riders must confirm the controller capacitor voltage ratings with the manufacturer first, as overvoltage input will instantly destroy the controller.
2.2 Discharge Capacity: Oversizing the Battery BMS
The current limit stamped on the controller casing (such as 20A, 25A, or 30A) represents the maximum current draw the motor can pull.
The golden rule: Battery BMS continuous discharge current must be greater than or equal to the controller current limit, with a 20 percent to 30 percent safety margin recommended.
For example, a controller with a 20A limit should be paired with a battery rated for 25A to 30A continuous discharge. If the battery cannot supply this demand, hard throttle input will drop the voltage, triggering low voltage cutoff and causing power stutter.
2.3 Discharge C-Rating and Real-World Verification
Discharge C-rating indicates the discharge speed and intensity of the internal cells. Maximum continuous current equals battery capacity multiplied by the cell C-rating.
Standard energy cells (1C to 2C) offer steady output. A 10Ah pack with 1C cells delivers only 10A continuous output, which suits only low-power 250W commuter setups common in EU urban areas.
High-drain power cells (3C and above) provide strong output. A 10Ah pack with 3C cells supplies up to 30A continuous output for high-torque motors and hill climbing.
Practical pre-purchase checklist:
Step 1: Confirm BMS continuous current is greater than or equal to controller continuous limit.
Step 2: Confirm BMS peak current is greater than or equal to controller peak current to prevent launch cutouts.
Step 3: Calculate capacity (Ah) multiplied by cell continuous C-rating. If the result is greater than or equal to the BMS continuous current, cell safety margin is sufficient; if it is lower, the battery specifications are likely inflated.
PART 3: PRACTICAL SELECTION: 3 STEPS TO THE RIGHT BATTERY
Riders can determine their ideal pack by calculating commuting range, measuring bike frame geometry, and selecting reliable cell brands.
3.1 Calculate Real-World Commuting Range
Energy consumption varies by riding mode and local terrain:
Full-throttle riding at 25 km/h (15.5 mph) consumes approximately 12 to 15 Wh per kilometer.
Pedal assist mode (PAS Speed sensor at medium assist) consumes approximately 6 to 8 Wh per kilometer.
Calculation example: A daily round-trip commute of 40 kilometers using medium pedal assist requires 280Wh (40 km multiplied by 7 Wh/km). For a 48V e-bike system, minimum required capacity is approximately 5.8Ah (280Wh divided by 48V). Factoring in cold winter capacity drops and avoiding deep discharges below 20 percent, selecting a 48V 10Ah to 14Ah pack provides a reliable margin.
3.2 Measure Frame Clearance and Select Form Factor
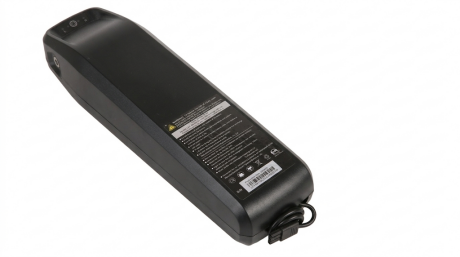
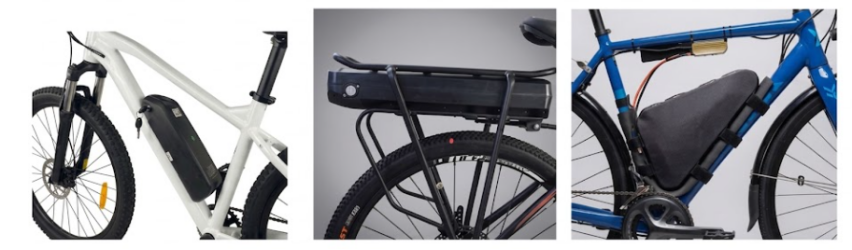
Downtube slider battery (Hailong or Polly case): Mounts to water bottle bosses, keeping weight low and centered for optimal handling. Installation trap: Always ensure 2 to 5 centimeters of upward and forward sliding clearance. If blocked by the top tube, the battery cannot slide off the bracket for indoor charging.
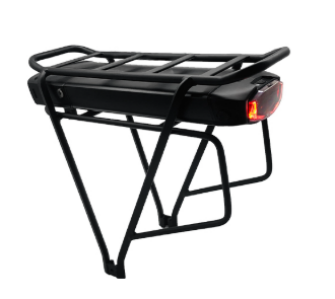
Rear rack battery: Best for step-through commuter frames or compact bike triangles. Note that mounting 3 to 5 kilograms over the rear axle shifts weight backward, which can make the front steering feel light or unstable at speed.
Triangle bag battery: Fits full-suspension and custom frames using reinforced hook-and-loop straps. It maximizes interior frame space for oversized, long-distance battery packs.
3.3 Evaluate Cell Sourcing
Prioritize tier-one branded lithium cells, including Samsung SDI, LG, Panasonic, and EVE, which offer low internal resistance, stable thermal control, and long cycle life.
Avoid cheap, unbranded packs made with salvage or secondary-use cells. These packs suffer severe capacity degradation within six months and carry significant internal short-circuit fire risks.
PART 4: SAFETY STANDARDS: REGIONAL CERTIFICATIONS FOR US, CANADA, AND EUROPE
4.1 In North America and European markets, verified lithium-ion battery compliance is mandatory for fire safety, transit access, and customs clearance.
Market / Region | Core Certification Standards | Key Protection & Testing Dimensions |
United States / Canada | UL 2271 (Batteries for Use in Light Electric Vehicle Applications) UL 2849 (Electrical Systems for eBikes) | Globally recognized as the most rigorous testing for motive lithium-ion batteries. Key evaluations include thermal runaway non-propagation (thermal barrier capability) at the cell level, vibration and drop shock resistance, as well as waterproof and salt-spray corrosion resistance. |
Europe-wide | EN 15194 (Electrically Power Assisted Cycles - EPAC) CE-LVD / EMC RoHS / REACH | Covers whole-vehicle electrical safety and battery protection directives; CE ensures low-voltage safety and electromagnetic immunity; RoHS strictly limits hazardous substances such as lead, cadmium, and polybrominated biphenyls (PBBs). |
Global Logistics Baseline | UN 38.3 Test Summary + MSDS | Mandatory certification for the transport of dangerous goods under United Nations regulations. Batteries must pass altitude simulation, thermal testing, continuous vibration, and external short-circuit tests. Serves as the mandatory legal credential for ocean and air freight. |
4.2 Spotting Counterfeit Certifications
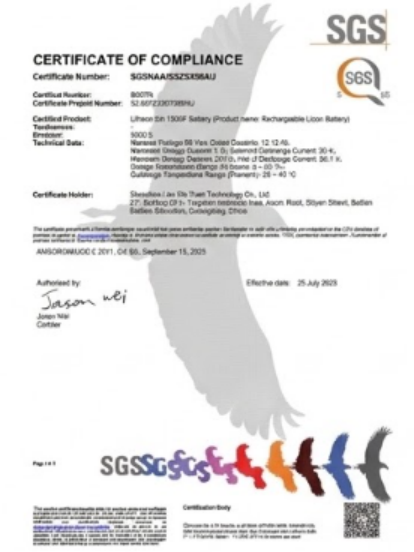
Verify complete assembly testing: A single cell holding UL 1642 does not mean the finished battery pack is certified. The complete battery pack and BMS assembly must hold independent UL 2271 or EN 15194 certification.
Check official laboratory listing numbers: Authentic certificates issued by accredited testing bodies like UL Solutions, TUV SUD, SGS, or Intertek include a traceable listing or file number printed on the pack's label that can be confirmed in online directories.
PART 5: CONNECTORS, STORAGE, AND MAINTENANCE GUIDELINES
Proper physical connections and daily battery care maximize service life and prevent electrical faults.
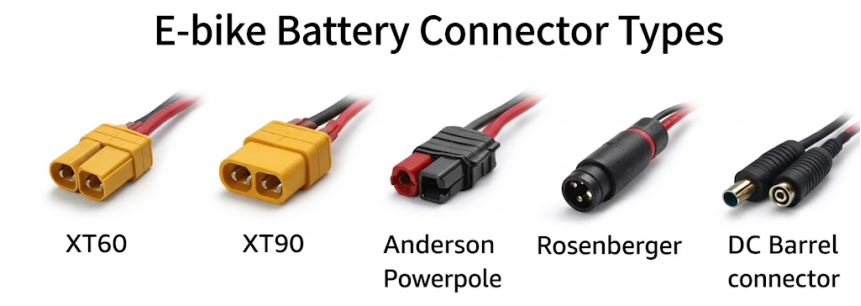
5.1 Selecting Power Connectors
For low-power systems (less than or equal to 15A and up to 500W), standard XT60 or Anderson 30A connectors are reliable.
For high-power systems (greater than or equal to 25A and 750W to 1500W and above), use genuine XT90-S anti-spark connectors. The XT90-S male plug features an internal pre-charge resistor on the tip that eliminates high-voltage arcing sparks during connection, preventing pitting on gold-plated contacts.
5.2 Storage and Daily Cycling Rules
Nominal System Voltage | Battery Chemistry / Type | Common Series Count (S) | Charger Output Voltage (Cut-off) |
36V | Ternary Lithium (NCM/NCA) | 10S | 42.0V |
48V | Ternary Lithium (NCM/NCA) | 13S | 54.6V |
48V | Ternary Lithium (Select US/EU Specs) | 14S | 58.8V |
52V | Ternary Lithium (NCM/NCA) | 14S | 58.8V |
5.3 Temperature Management and Chargers
Never charge lithium-ion batteries below 0 degrees Celsius (32 degrees Fahrenheit). Sub-zero charging causes metallic lithium plating to form on the graphite anode, piercing the separator and causing irreversible internal short circuits. After winter riding in cold climates, bring the pack indoors and allow it to warm above 10 degrees Celsius before charging.
Always use a dedicated smart charger featuring Constant Current and Constant Voltage (CC/CV) stages that match your battery chemistry and cut-off voltage, and avoid unverified generic fast chargers.

